Unified Capture Design Language
Bringing order to chaos.

Bringing order to chaos.
Project Information
This project was started in 2022 and has been used with the BodyScan R2.0 update. The UCDL project is far from complete. Although it has been implemented in BodyScan, there is still much work to be done.
As more scans are updated with the UCDL, outstanding items like color schemes, typography, layout, interactions, usability considerations, iconography, and image guidelines will be established.
This document is a long read, as the original text was written for teams that have little or no UX knowledge.
Project Resources
⁍ The main UCDL Figma Project
⁍ Additional: BodyScan R2.0 – First integration of UCDL, BodyScan R2.1 Updates
Company
Advanced Health Intelligence
The visual appearance of scans had become fragmented as new scan technologies were being introduced into the company's offerings. Originally, AHI had one technology called BodyScan (now Body Analysis).
The available scans at the time of creating the UCDL were:
⁍ BodyScan: Body circumference and composition
⁍ FaceScan: Cardiovascular Health assessment for CVD, heart attack, stroke
⁍ FingerScan: PPG analysis for Fitness Evaluation and Health at Rest in the BHA.
⁍ DermaScan: Image-based skin condition identification
All scan technologies, with the exception of BodyScan, were licensed from third parties and had limited theme options that we could offer our partners. For example, at the time, FaceScan was provided by Nuralogix and offered simple color and font family changes.
It was clear that when you conducted any of the scans, they were all visually different and it was clear that they were made by different companies.
Scans were also no longer restricted to the smartphone. For example, a FaceScan could be performed in a modern web browser using the HTML5 Video API to capture face markers and send de-identified data to the cloud.
DermaScan can use any photo of skin conditions as input, so a “headless” batch identification from a repository of images was possible. It could also use a simple HTML5 file upload field in a web browser on any internet-connected device.
A new version of BodyScan was already in development and going through several user testing stages. The opportunity to update the capture UI and establish a design language for all scans presented itself.
With that in mind, I created a UCDL for all scans, which consisted of building blocks with their own properties that could extend into any digital space.
This could be circulated to teams so they could see the vision behind the change and hopefully prioritize the visual updates to bring maturity to the product offering.
The UCDL was still in concept and would only be under consideration once engineering had completed its backlog of work. Using BodyScan to refine its options and needs was a project I undertook myself while doing other work. It would need to standardize the font system and address the tokenization of theme options.
⁍ Align product offerings so that they are consistent across all partner integrations.
⁍ Improve scan familiarity and reduce complexity, thereby improving scan success.
⁍ Simplify the integration of future scanning technology by introducing a reusable set of UI elements and methodology.
⁍ Improve market distinction from competitor technologies.
⁍ Improve usability by presenting a consistent experience.
⁍ Improve market perception by offering a suite of similarly themed scans.
⁍ The UCDL sits alongside the M3-AHI Design System, following some of the same conventions and token options, but it extends the system by addressing the specific needs and expected outcomes of the scan experience.
I had to map each component and where it would be used. In some cases, it would be the same visual UI but have a slightly different context for use:
⁍ All Scans: On-screen Messaging, Frame, Outline, Countdown (circular, numeric pre-countdown, timer)
⁍ FaceScan: Scene Indicator (Stars)
⁍ Bodyscan: Alignment
⁍ Bodyscan, DermaScan: Camera Flash
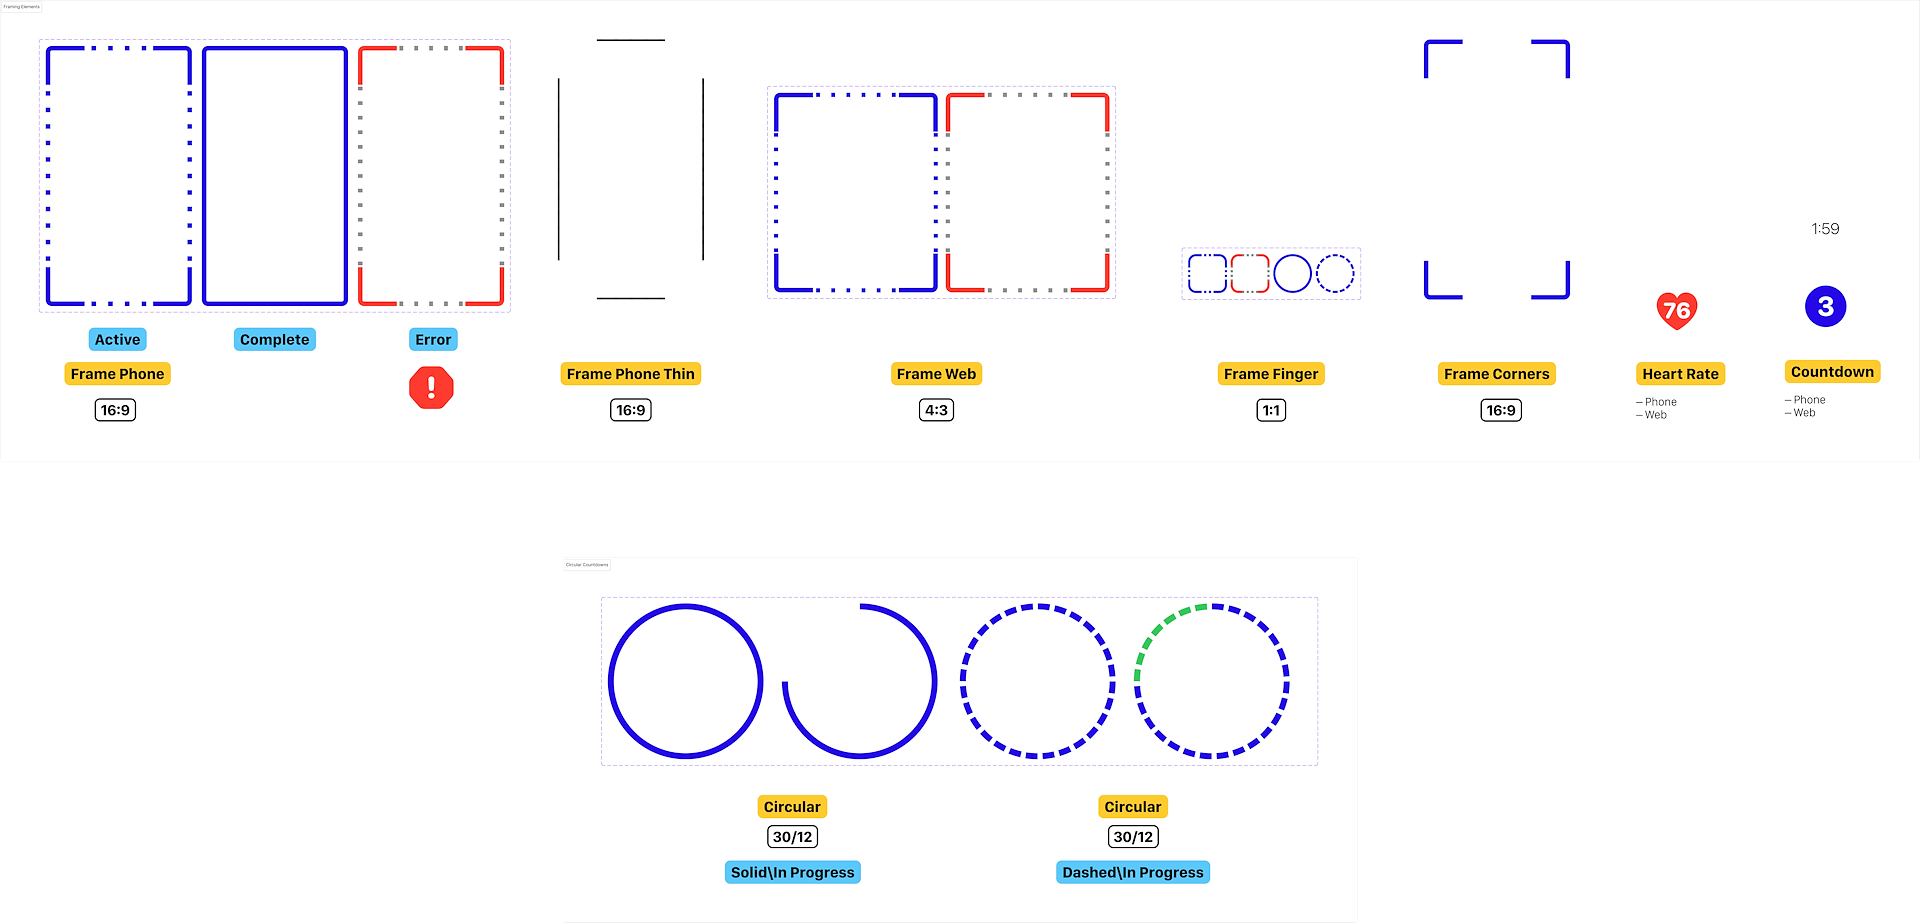
Example of components: layout options and states.
The complete body of work extended beyond the design system alone. The project did inherit some default color schemes, typography, iconography, and image guidelines but did not define any interaction, audio, or usability enhancements that are specific to the UCDL.
There are naming convention changes and changes to how the teams need to collectively refer to items in the UI and in the SDK. I would need to be clear on the internal and external references to visual items so that product designers, marketers, customer success, and developers could speak with their counterparts within AHI.
Promotional material
Website and other promo materials would need this new imagery, multiplying the handover materials once each piece was completed. Luckily, the development would be staggered and available for release in cycles.
Extended product support
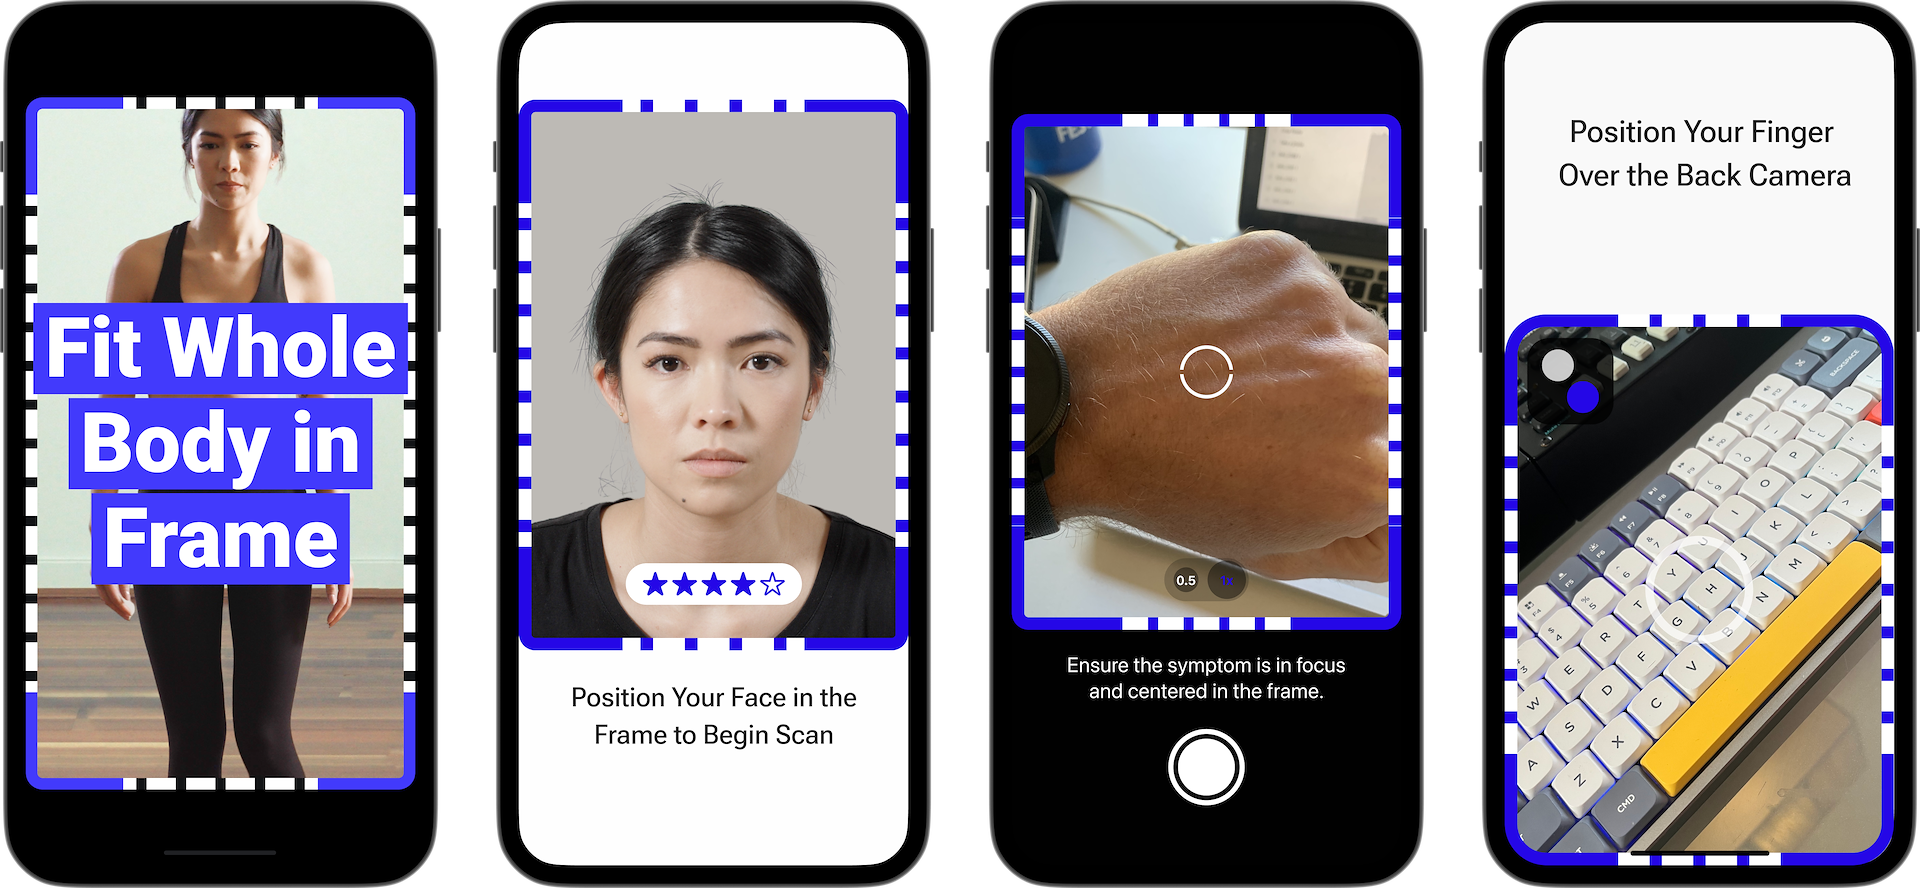
The product work was also not just limited to the capture itself. The scan guides and tutorials would need to reflect the UI updates. The copy and how we refer to an action, such as “Position your face in the frame” and "Fit your body in the frame," would also need to be updated.
Training and support documentation for partners are also part of the delivery milestones. These contain videos, images, support responses, and FAQ-like materials to help them support their users.
Component scaling & aspect ratio
The components also need to operate with automated parameters depending on the use case. For example, a 5pt stroke from 30-60cm away during a FaceScan would not be as visible 1.5-3m away during a BodyScan. This is also applied to the distance of dashed lines. Scaling and aspect ratio would need multipliers or static values set and would be part of the integration.
Theming via tokens
Partners would need to theme the new UI to match their branding. The theming was already fragmented, but the UCDL would unify the token system and ensure that if there was a primary color change to a framing border in BodyScan, it would also be applied to the face. This would then be documented in SuperNova for handover to partner developers.
Partner theming is a separate project due to its complexity and the risk of exposing visual items which could cause usability, accuracy, and repeatability problems.
Canvas playground of theming options.
The MultiScanSDK (and MultiScanWebSDK) is where the UCDL will be implemented. MultiScanSDK had a strict entry and exit point pointing to a scan module, which could be BodyScan, FaceScan, FingerScan, or DermaScan. Once initiated, the camera and accompanying magic would start and capture and process signals. Then, once completed, it would exit and return to the partner app or the BHA (Biometric Health Assessment) white-label app displaying results.
Since all modules are camera-based, the goal was to use common metaphors to help instruct the user. These are designed into widespread technology, and we accept them as everyday language.
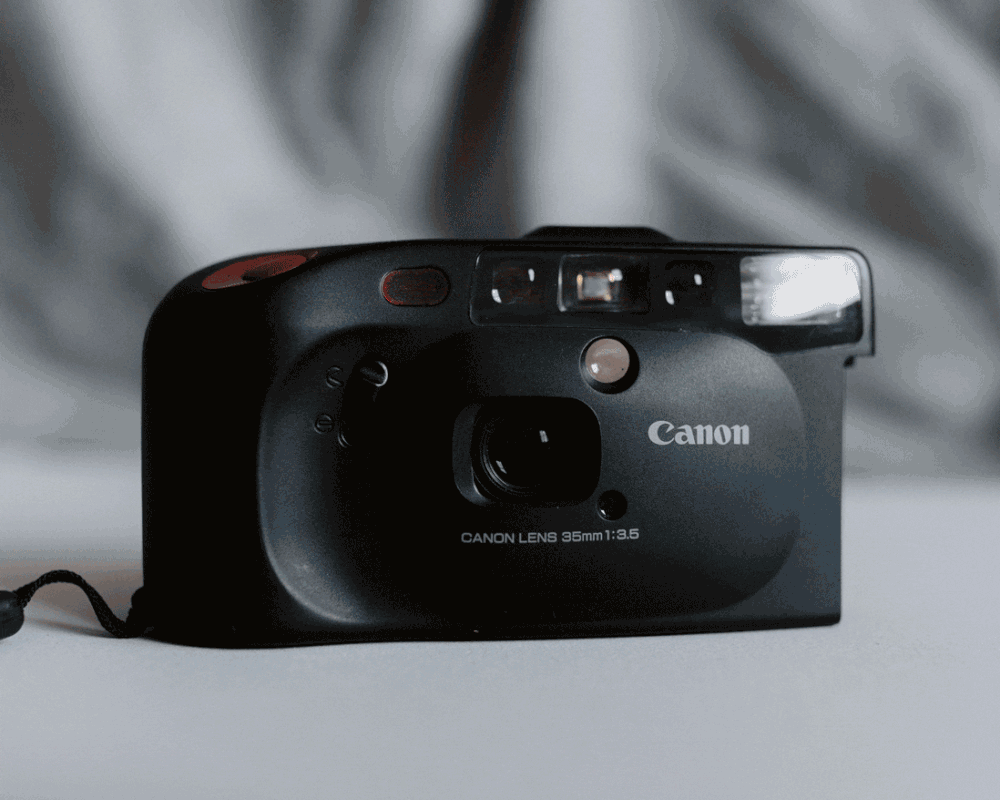
Think of the DSLR or video camera and a “viewfinder” which had a “lens” you would place your eye against to get a “portrait.” You then adjust the camera and “focus” to “fit” a person into the “shot.”
In a group shot, you might set a “timer," which has a "countdown” that then audibly beeps at a certain time and triggers flashes to prepare & warn everyone to stop moving and smile.
All of these elements we take for granted and seem so intuitive that we do not think. Yet, at the time, the people designing the camera and the features had to conduct user research before release.
As time progressed, manual DSLRs gained automatic modes, and a new breed of cameras, the point-and-shoot, became popular. These were largely replaced by smartphones today, but they carry over the same key elements as commonly accepted truths.
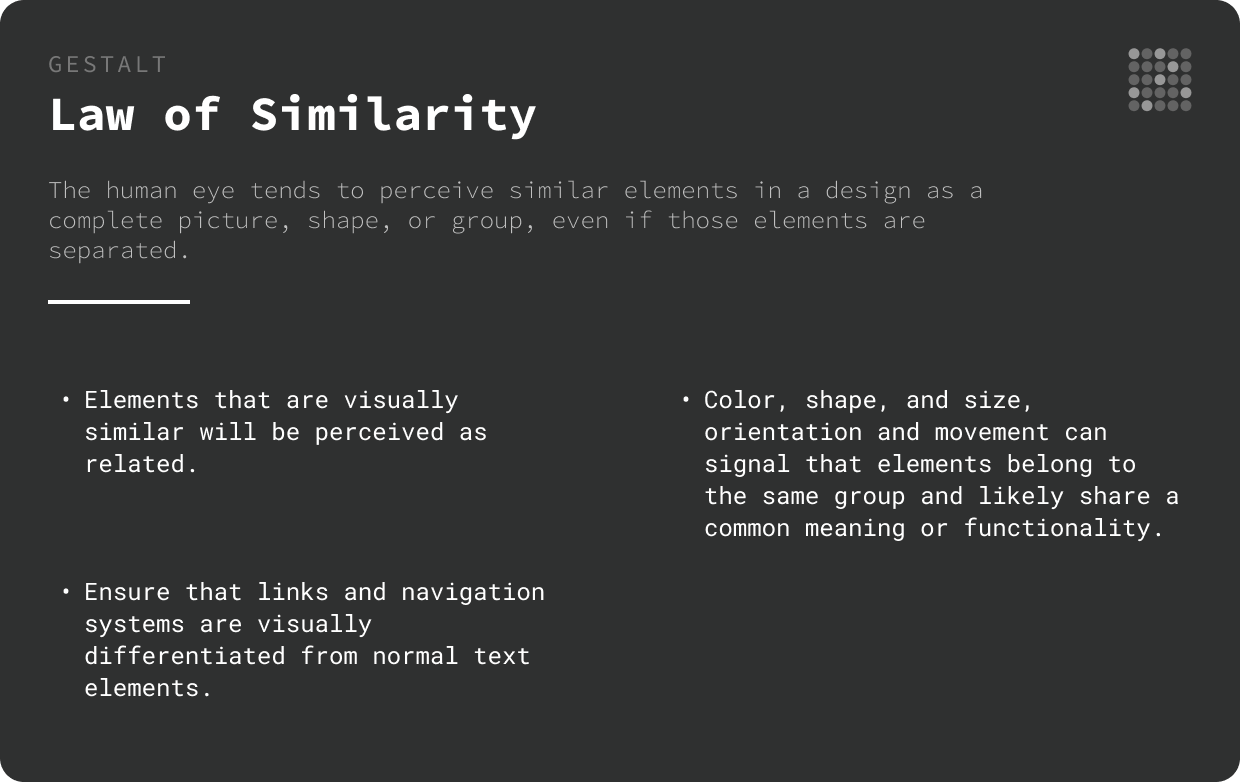
UX Laws were referenced inside the handover documentation to help the wider team understand the decisions being made.
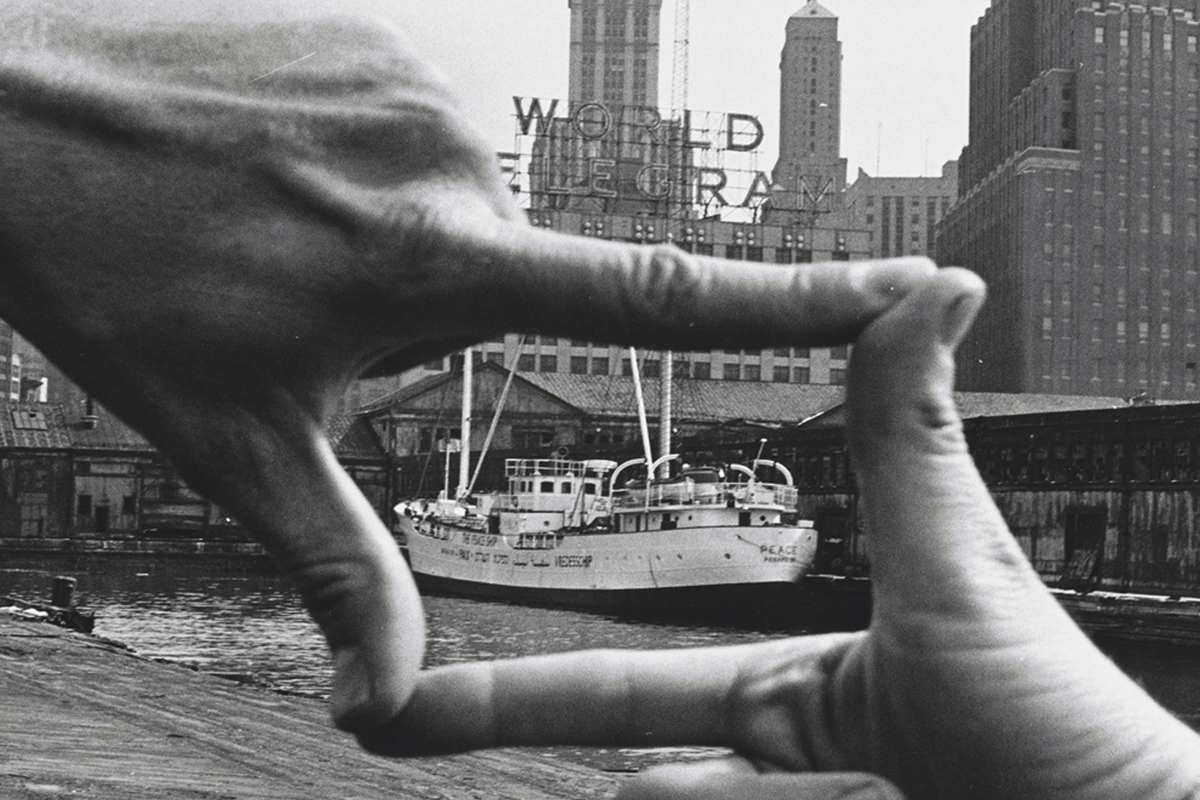
Concept: The Frame
A picture “frame”… and how you use “framing” as a way to refer to making sure something is photographed correctly. A more common one is a “selfie” (self-portrait). The phone screen forms the boundary of the image, and you “position” your head into the “right spot” and angle the phone for the best “selfie.”
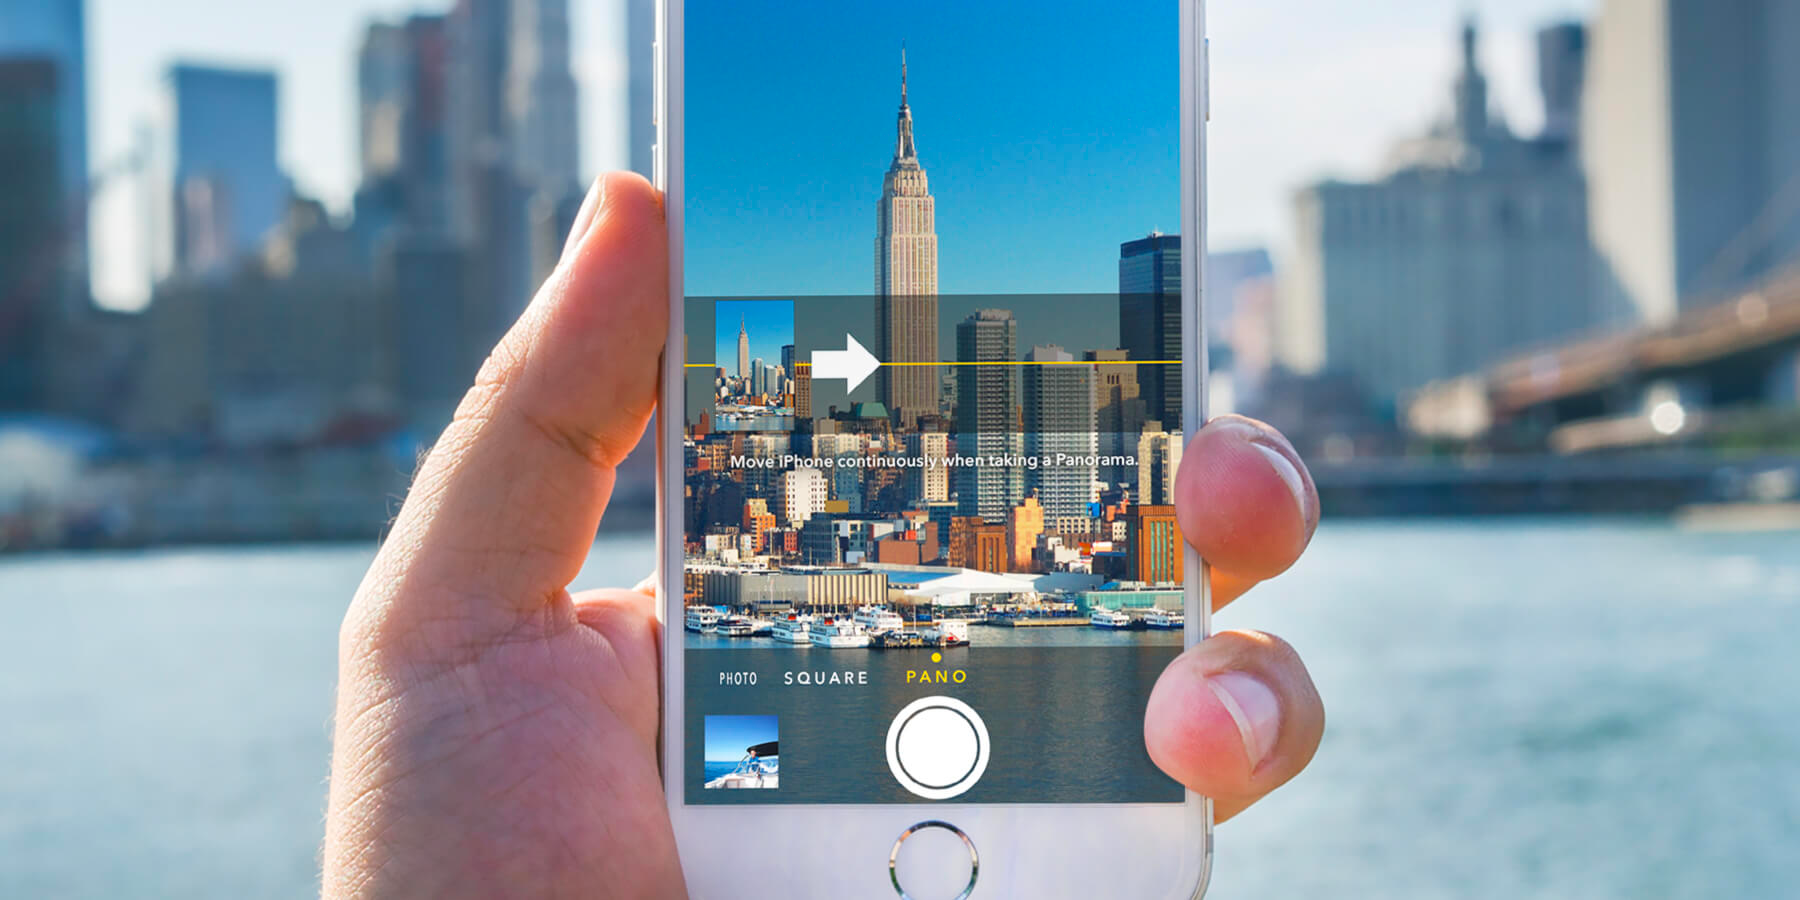
Over time, some things have evolved. The viewfinder becomes the screen. We have on-screen controls and the picture visible to us. We also have new photo modes like portrait and panorama.
When we take a panorama photo, the screen displays interactive UI feedback and provides minimal instructions to perform the task. As you move your hand and try to remain steady, the UI will update and show an unpreventable wobble but eventually succeed.
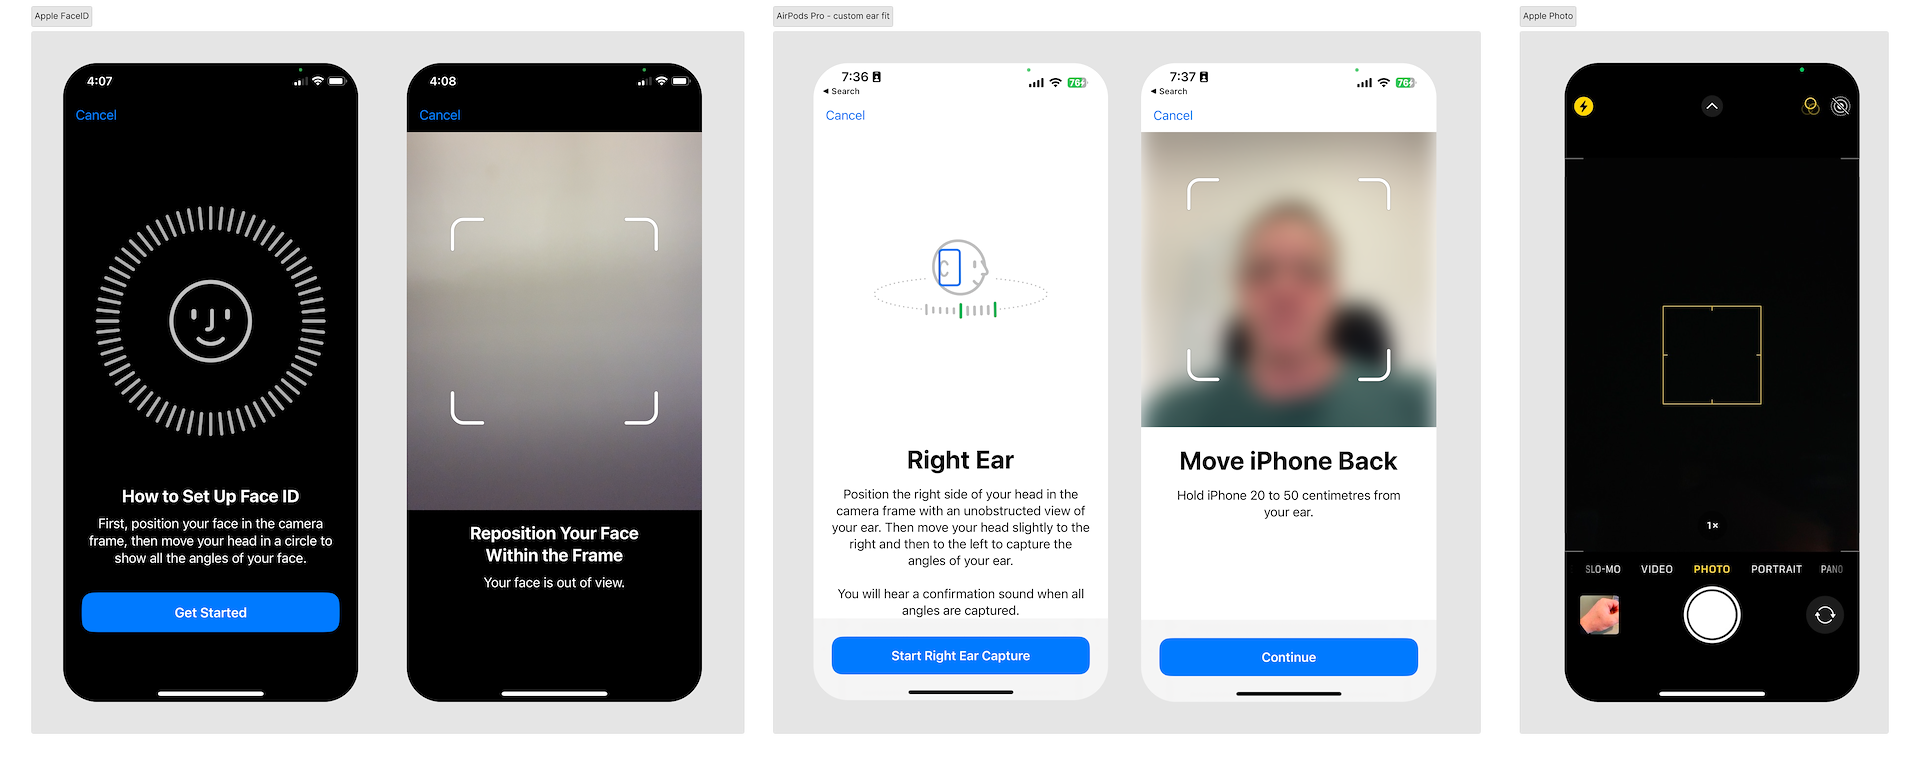
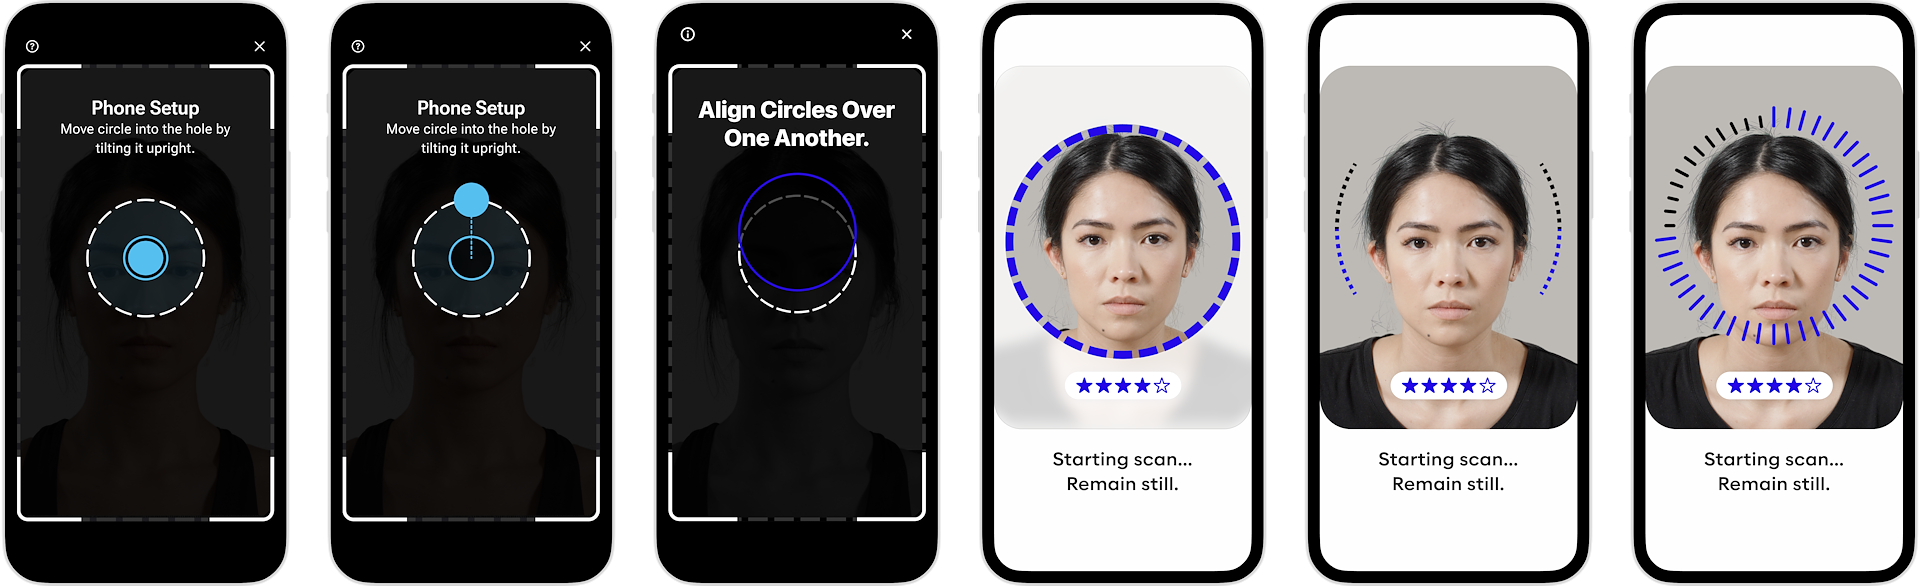
Apple FaceID uses framing and UI feedback to guide the user through establishing a face scan. AirPods Pro has a feature to capture the ear shape using the phone (not exactly easy since you can’t see the screen when you’re doing it, but it worked for me). Apple Photo has a very light frame to make the image crop more visible.
Example of framing within Apple FaceID.
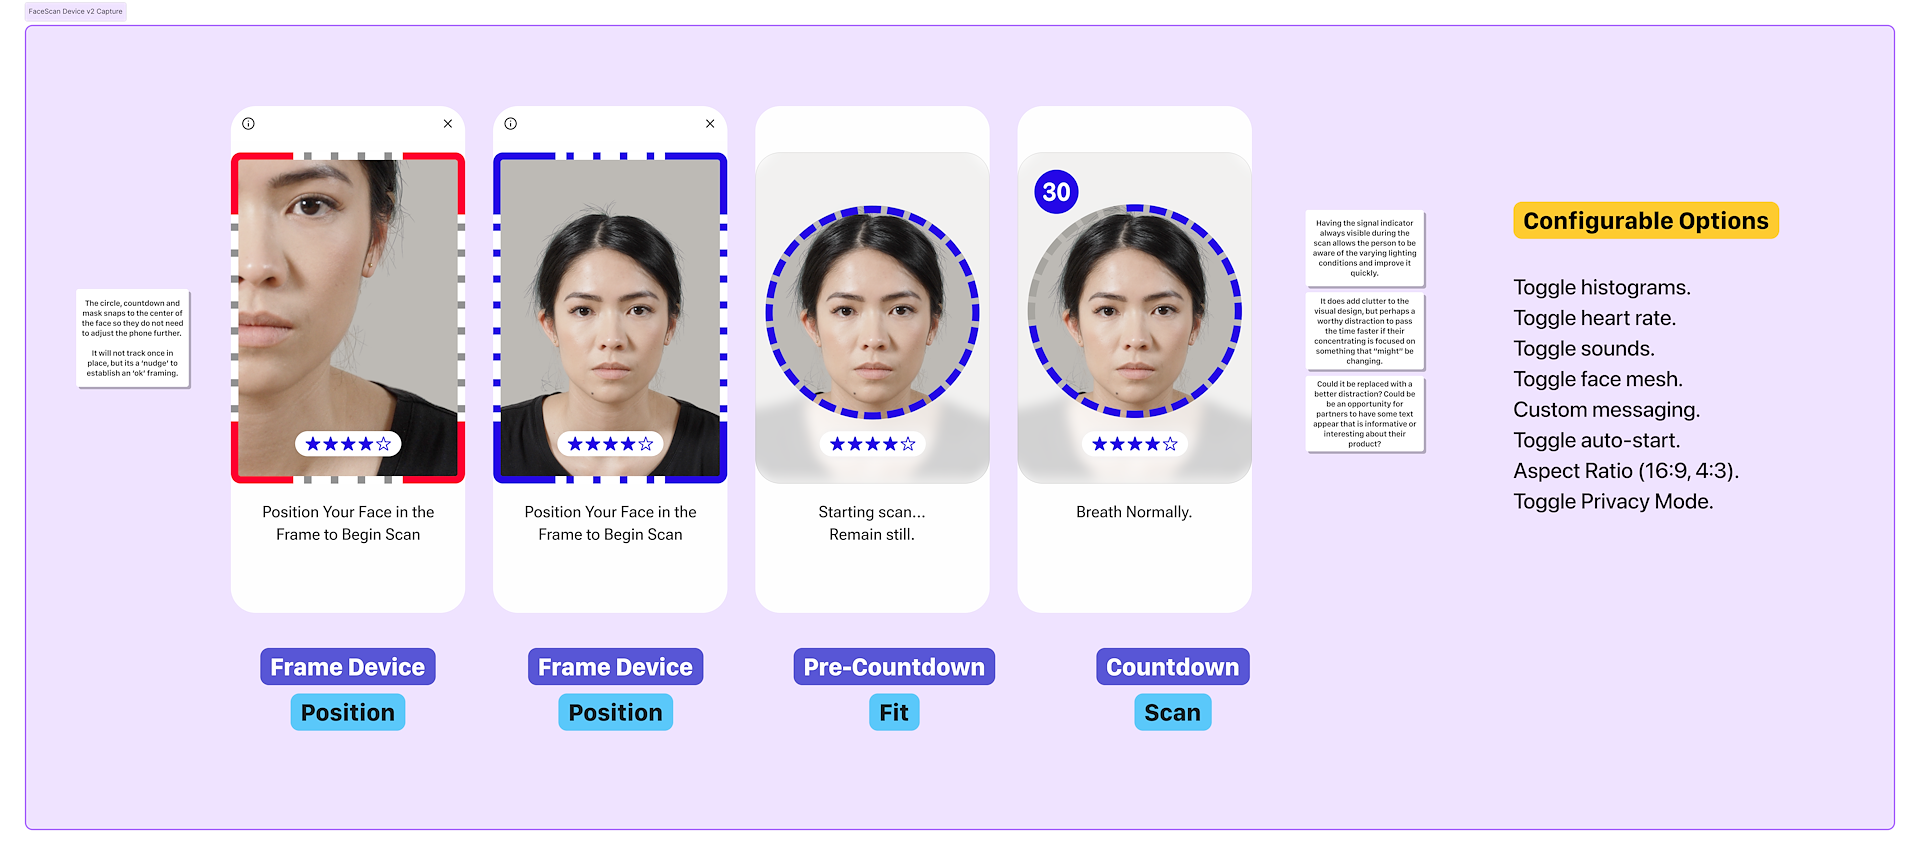
Interactive Feedback
A UI component becomes valuable when it can be repurposed to demonstrate or indicate something else. For the user, it is a moment of wonder, but behind the scenes, it is a seamless transition without disruptive noise that imprints itself in the brain during visual changes.
Such that:
⁍ The goal is to use the outline and various other elements as part of the interactive feedback layer.
⁍ This is a beneficial technique that portrays a clean and fluid-like experience rather than elements appearing and disappearing in jolting transitions. They bring focus to one area and draw it to another in a continuous single animation.
⁍ The alignment circles forming a circular countdown is an example of this, as is the camera hole forming a countdown timer. "Starting in 3, 2, 1…" sets the cadence and predictability of what's coming next.
⁍ The value of interactive feedback: It brings a sense of joy combined with ease of use that is absent from many mobile experiences. Failure to provide this layer will amplify any shortcomings.
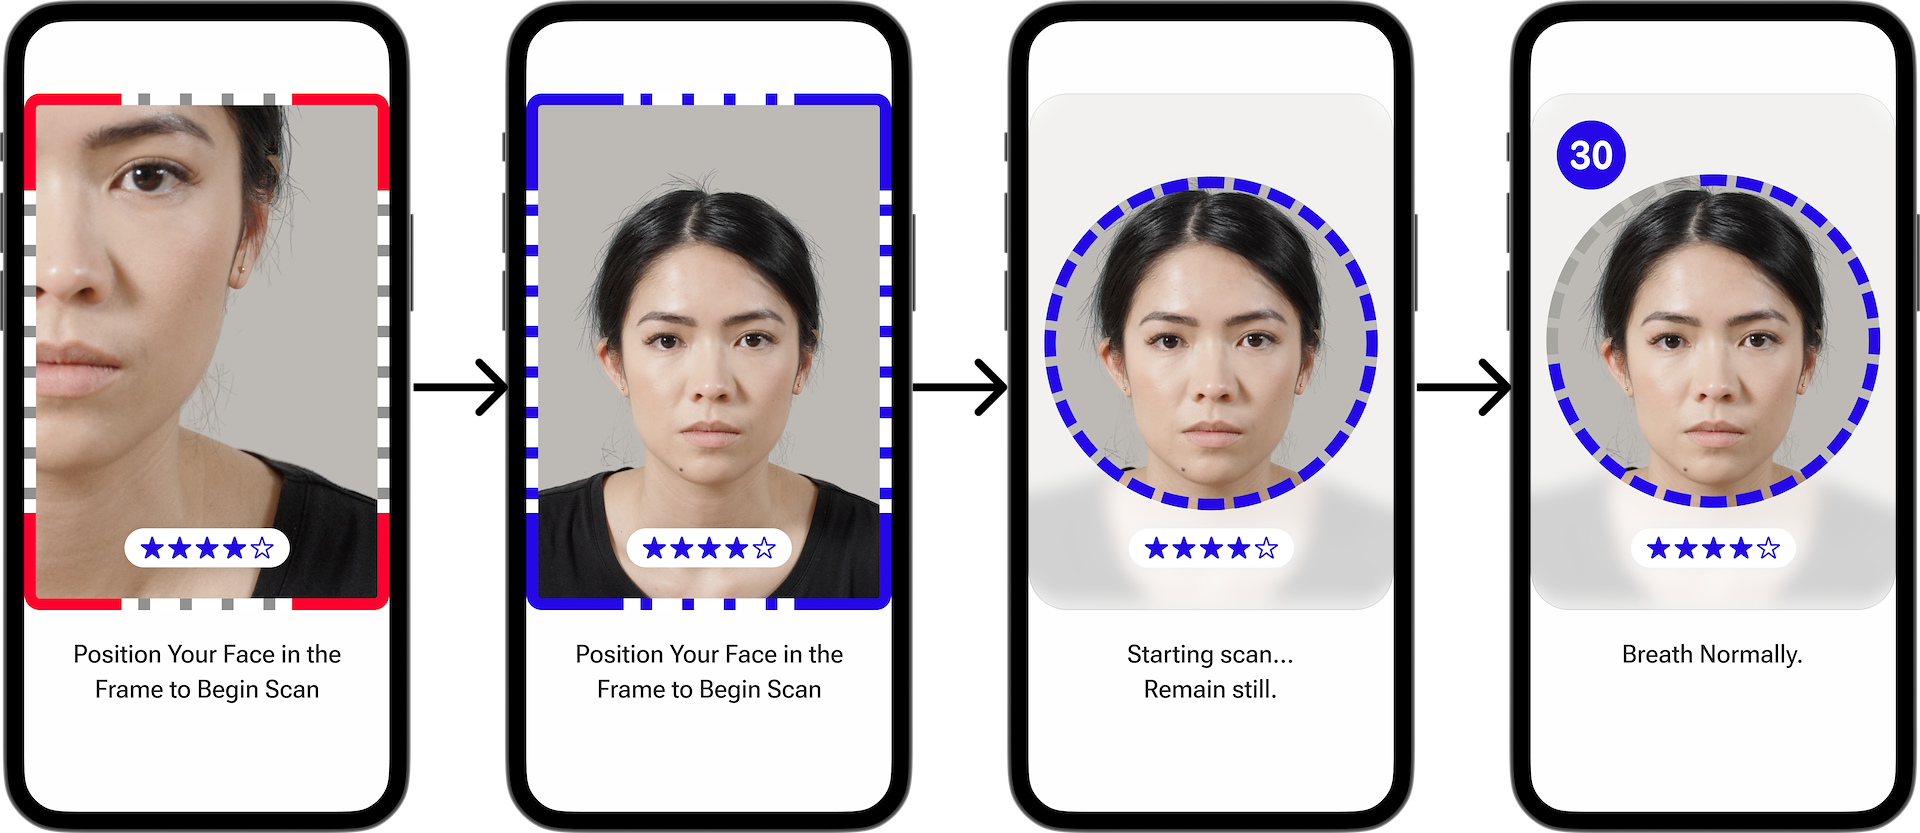
UI Feedback: The frame is used as an indicator, and animates (resizes) to circular countdown.
There are a growing number of components that are part of the UCDL. Some scans have very specific UI components. For example, the FingerScan has a PPG graph appearing, and the FaceScan has histograms showing the SNR from facial features.
Below are explanations of the frame and outline that were circulated to the wider teams.
The Frame
Moving an object or thing into the frame is known as the “positioning stage.” For example, a person will position their face, their whole body, or a skin condition into the frame. This is a common task in all camera-based capture methods.
The frame is a feedback indicator and later countdown guide. This visual change is further used with the outline going from a dashed line to a solid line during a BodyScan.
The 'frame' used in BodyScan, FaceScan, DermaScan and FingerScan.
The Outline
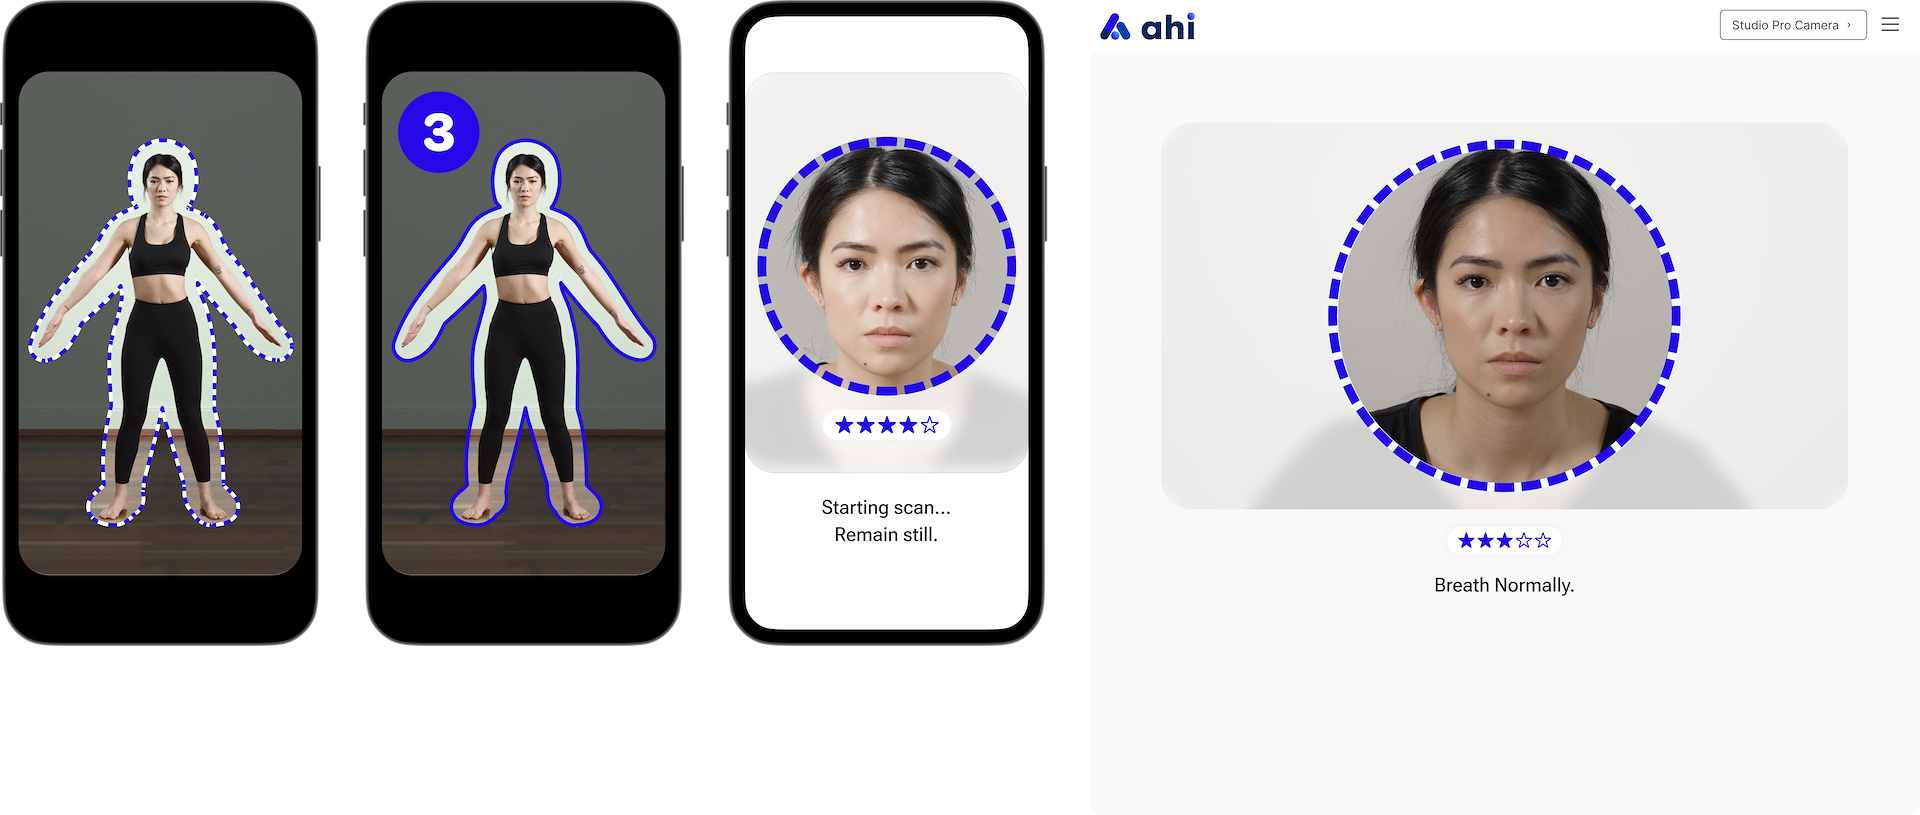
The Outline is sometimes referred to as the silhouette in BodyScan and the 'Circle' in FaceScan.
⁍ It is symbolic of a shape that is meant to fit something into. In BodyScan, this is the whole body making a pose, and in FaceScan, it is a person's head.
⁍ The outline can vary in shape, and the name can refer to various 'decals' that a person will intuitively need to fit inside.
⁍ The exception is fitting something in-frame, which is when you are in the context of taking a photo. In this case, the frame itself is the camera, and you are positioning yourself inside the frame as a whole. This is similar to the first step of BodyScan, where the frame is used for depth positioning, and then further refining the movement.
⁍ In FaceScan, the face is likely to be visible from less than arm's length (about half). The pre-existing knowledge of the selfie process and cameras, in general, reduces the learning curve to already have the head fitting in the whole camera view. For this reason, providing an outline decal to further position their head correctly, much like BodyScan, is a re-use of existing flow.
The outline in BodyScan, FaceScan (handheld and web).
During the process of establishing the UCDL, I had a few new and interesting ideas present themselves.
Modularization
Components would eventually be modularized due to the adoption of the UCDL. This would mean that we could have multiple variations of certain UI that a partner could choose from. For example, if they wished to use a golf ball method of alignment instead of the current circular one, they could set that parameter.
Alternative ways the UI can be updated once a UCDL has been user tested and established.
Learning through Failure
It is possible to adopt the approach of learning through failure. This is where a person is expected to fail the first time, but after that, they will have 100% success. While not the first choice, it is an expectation you can control and leverage if you are aware of it.
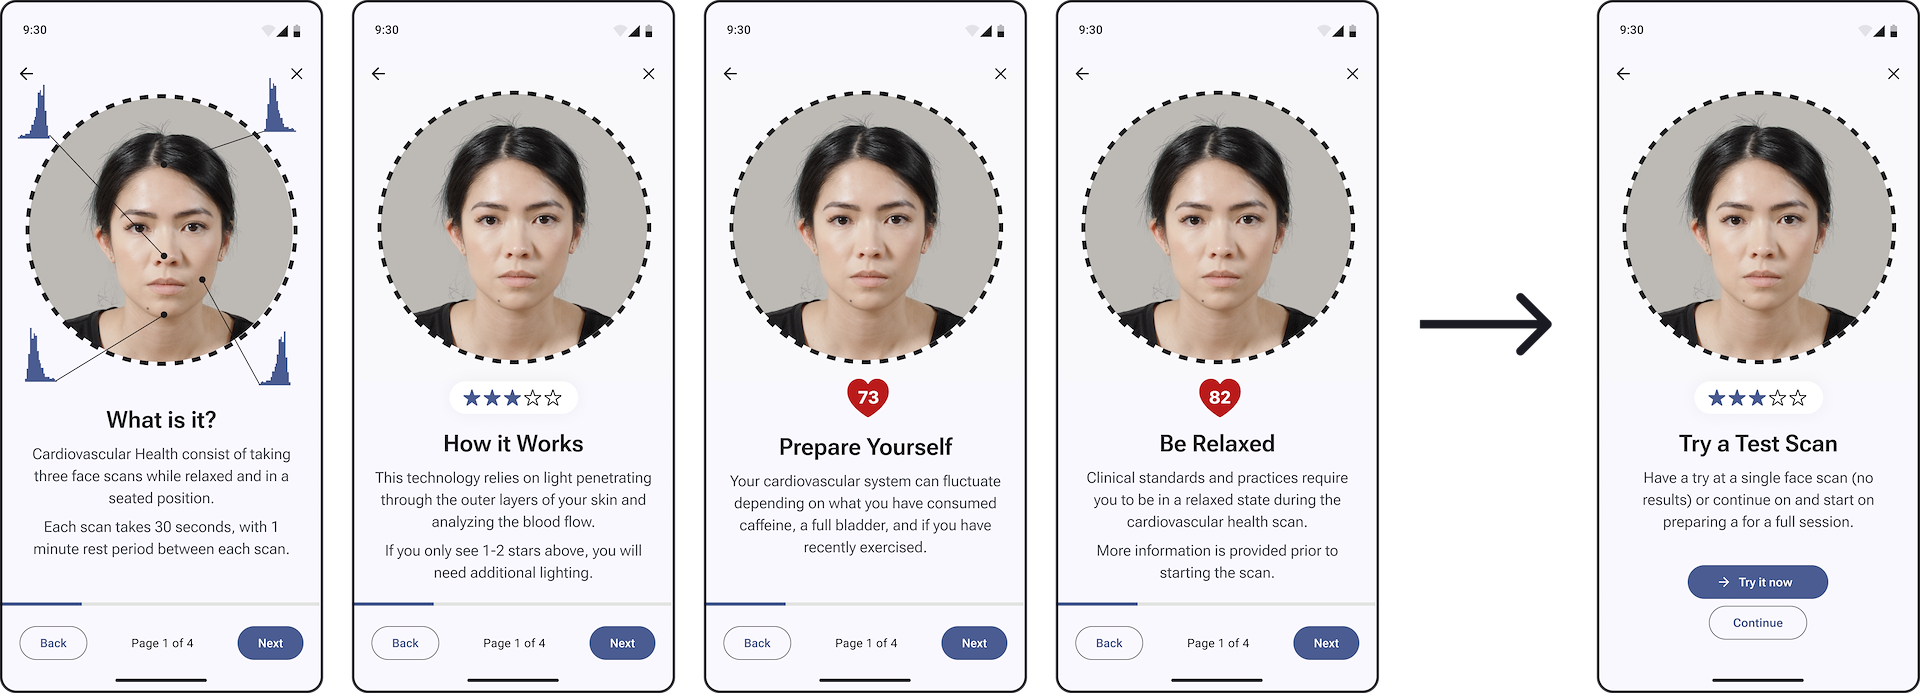
The Practice Scan
The goal is to improve familiarity with the scan by removing the major barriers of being in form-fitting clothing, proper framing, etc., and disabling inspection.
They just set the phone up and give it a go. We don’t care about the results, but can instead show them what they will get if they follow the guide correctly.
The practice scan achieves some major wins. They have just covered the most important steps in performing a scan and are instantly familiar with the product.
A further iteration of this concept is to use the scan and use of the camera as part of the onboarding in broader products, such as the BHA (Biometric Health Assessment). I further researched this as “Scan assisted interactive guides.” BodyScan was on the to-do list.
Confidence Scores
“A Confidence Score is a number between 0 and 1 that represents the likelihood that the output of a Machine Learning model is correct and will satisfy a user’s request.” This is particularly relevant when looking at results being returned from a scan.
For example, if there is a 76% chance of a skin condition being correct, but you order them from 1 to 10 without showing some indication of how confident you think you are, then it might not bring importance to the result and give no opportunities to refine further to improve confidence.
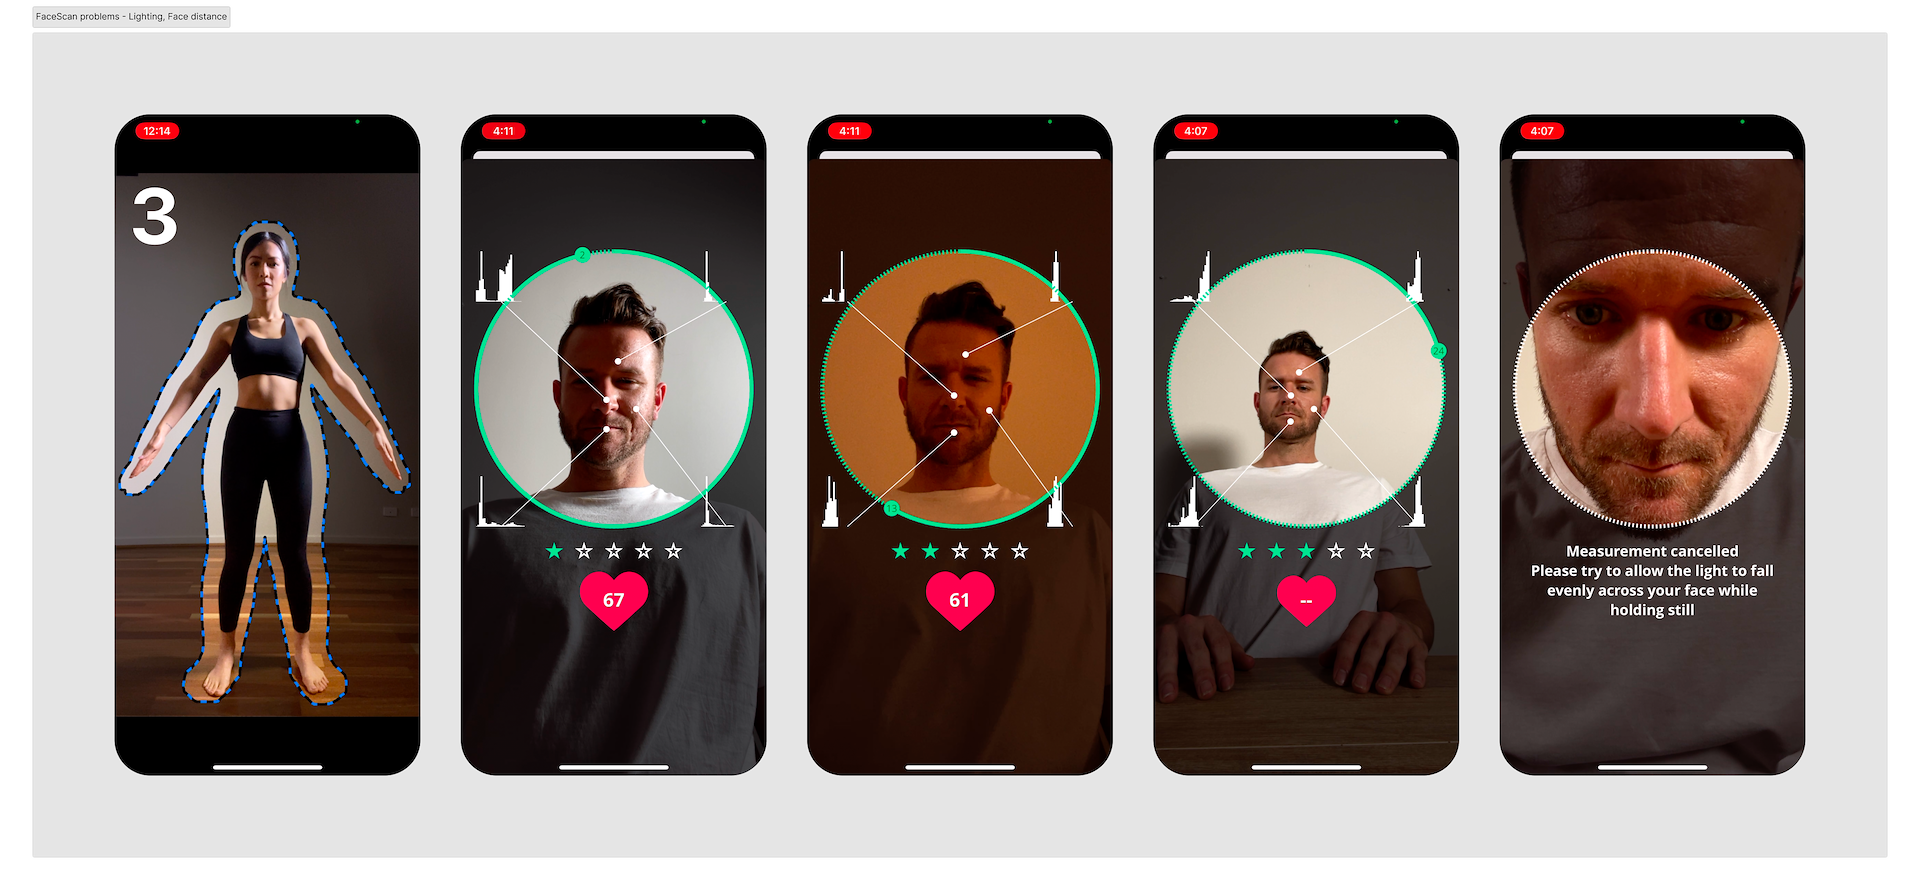
If we extend this confidence score (multiple scores) to include factors before and during the scan, such as lighting, pose, background, position, etc., then you can also bring about a certain confidence ‘of success’.
Various examples of scan conditions which can be measured to provide a confidence score.